How to Lower a Volkswagen T4 Properly
A practical guide to lowering a Volkswagen T4 using the suspension layout it actually has: front torsion bars and rear coil springs. This guide explains the correct approach, the checks that matter and the shortcuts worth avoiding.

Suspension work affects steering, braking, tyre wear and vehicle stability. Support the van securely on suitable axle stands, never work beneath a vehicle supported only by a jack, and use springs and dampers that are suitable for the van’s axle weights. If you are not confident carrying out suspension work safely, use a competent workshop.
How the T4 suspension is lowered
The Volkswagen T4 does not use a conventional front coil spring or a front coilover setup. The front suspension is sprung by longitudinal torsion bars. Front ride height is adjusted at the torsion bar adjusters. The rear uses separate coil springs, so rear ride height is changed by fitting suitable lowering springs and, where appropriate, the correct spring pads.
That difference matters. A proper T4 lowering setup should treat the front and rear as one system, then finish with a full geometry check rather than simply chasing a wheel arch measurement.
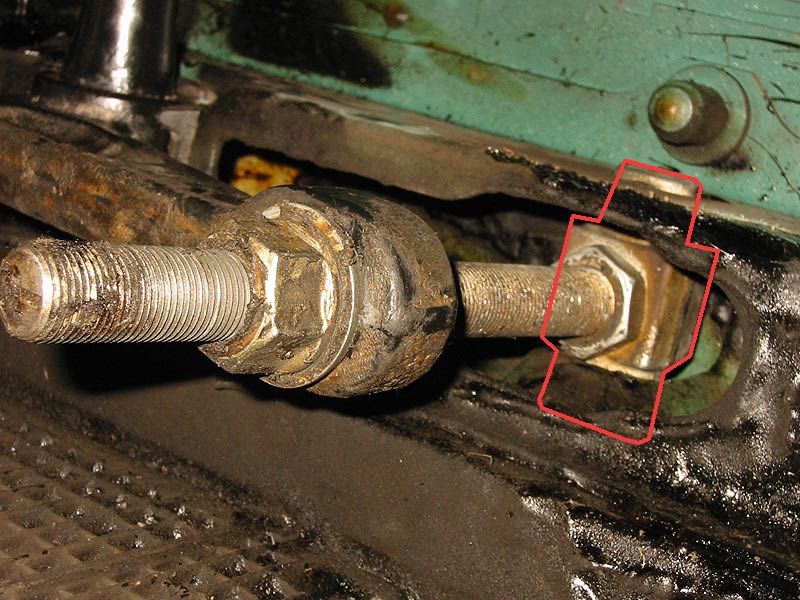
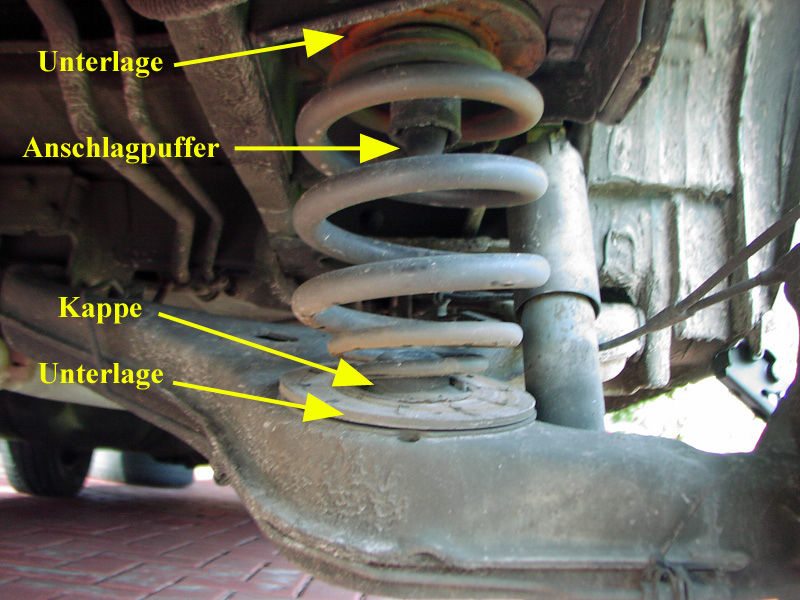
Technical reference photographs: T4-Wiki.
What you will need
Before changing anything
Park the van on level ground with normal running weight aboard. Check tyre pressures, then measure the existing ride height on both sides. A repeatable method is more important than the exact datum: use the same measuring points before and after and record all four corners. Before touching the front torsion-bar adjusters, also measure and record the exposed thread on each adjuster so you have a reliable starting reference.
Inspect tyres, ball joints, track rod ends, control arm bushes, anti-roll bar links, dampers and spring seats before lowering. Lowering a tired suspension rarely cures anything; it usually just gives the worn parts less travel in which to complain.
The job, step by step
Choose the target ride height
Decide on a sensible drop for the way the van is used. Camper conversions, heavy interiors and different axle ratings can all change how a nominal spring drop sits in the real world. Do not assume the number printed on a spring box guarantees the exact finished ride height.
Support the rear of the van safely
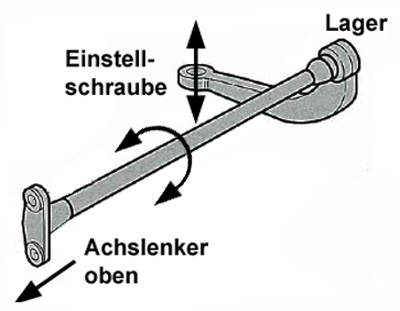
Chock the front wheels, loosen the rear wheel bolts, raise the rear of the van and support it securely at suitable structural lifting points. Remove the rear wheels. Position the jack so the trailing arm can be supported and lowered in a controlled way.
Remove the rear springs
Support the rear suspension before allowing the trailing arm to move downward. Depending on the van and available droop, additional components may need to be released in accordance with the workshop procedure to prevent hoses, cables or dampers being strained. Remove the original spring and inspect the upper and lower spring pads and seats.
Fit the lowering springs correctly
Install the new rear springs in the correct orientation with the appropriate spring pads. Make sure each spring is properly seated before raising the suspension back into position. Repeat on the opposite side and refit any components that were released using the correct tightening procedure.
Set the front using the torsion bars
With the van safely supported and the torsion bars unloaded enough to make adjustment manageable, clean the adjuster threads and record the starting position on both sides. The T4 uses an adjustment nut at the rear support of each torsion bar. Turning the adjuster changes torsion bar preload and therefore front ride height. Make small, even changes side to side rather than winding one side dramatically in one go.
Settle and remeasure the van
Refit the wheels, lower the van to the ground and roll it backwards and forwards so the suspension can settle. Recheck all four measurements. Adjust the front again if necessary until the van sits evenly and retains sensible suspension travel. Do not set the front so low that it is effectively resting on the bump stops.
Check clearances through the full steering range
With the van on the ground, check tyre clearance at full steering lock and inspect brake hoses, driveshafts, arches and suspension components for interference. Remember that a stationary clearance check is not the same as suspension compression on the road.
Have the geometry set professionally
Changing T4 ride height changes suspension geometry. Have wheel alignment checked and adjusted once the final height has been established. Camber and toe are particularly important for tyre wear and stability, and caster should be checked as part of a proper alignment.
Extra checks on some T4s
Some T4s use a load-dependent rear brake pressure regulator. If your van is fitted with one, lowering changes the suspension position that the regulator responds to, so its setting must be checked and corrected where required. Headlamp aim should also be checked after changing ride height.
What about dampers?
Lowering springs do not automatically mean every T4 needs the same damper. Damper choice should suit the amount of lowering, spring rate, vehicle weight and intended use. Very low setups can reduce available damper travel and ride quality. For a road-going camper or daily van, maintaining usable suspension travel is usually more valuable than chasing the smallest arch gap.
Shocks and shortened dampers
For modest drops, a good quality standard-length damper may still be appropriate if it retains the correct working travel. For deeper drops, shortened dampers are often used so the damper operates in a more suitable part of its stroke and remains controlled at full droop. The correct choice depends on the spring, finished ride height, axle load and how the van is used.
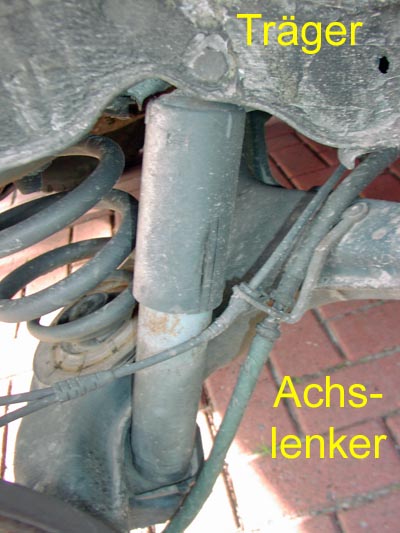
Do not choose dampers on the basis of lowering amount alone. Check the manufacturer’s application data and make sure the suspension still has usable compression and rebound travel once the van is sitting at its final height.
Deeper drops and front geometry
As a T4 is lowered further, driveshaft angle, steering geometry, bump-stop clearance and anti-roll-bar geometry all become more important. Some lower setups use revised drop links or other supporting components, but these should be selected to correct the actual geometry of the van rather than fitted simply because the vehicle is lowered.
If the suspension is sitting close to the bump stops, tyres contact the arches, driveshaft angles become excessive or alignment cannot be brought back into an acceptable range, the solution is not to keep winding the van lower. Raise the vehicle or revise the setup.
Troubleshooting after lowering
Parts and suppliers
Use suspension parts that are listed for the correct T4 variant and axle load, and avoid vague “fits all T4” listings. The Just T4s Handbook will link recommended parts, tools and trusted suppliers from this guide as they are tested or verified.
VIEW T4 TOOLS & ESSENTIALS FIND A T4 SPECIALIST
Related Just T4s guides
This suspension guide forms part of the Mechanical & DIY section of the T4 Handbook. Continue with VW T4 Gear Linkage Problems & Repair or VW T4 Short Shift Mod. Further guides will cover wheel alignment, front suspension inspection and brake checks.
Common mistakes
Checks before finishing
Recheck wheel bolt torque, confirm the springs are correctly seated, verify clearance around tyres and suspension components, and check that nothing has been stretched or trapped. After a short road test, listen for new noises and recheck the ride height. Have the final alignment completed at the intended running height.
Exact parts, spring rates and workshop tightening values can vary by model year, axle rating and suspension specification. Check the parts against your actual vehicle rather than relying on a generic “fits all T4s” listing.
Discuss this guide
Found a setup that works well on your T4, have a question about spring choice or want to show your finished ride height? Join the matching discussion in the Just T4s Forum.